Homemade Thin Mints
Posted by bakingwithcinnamon on June 12, 2009
See those cute little Girl Scout girls selling over priced cookies in increasingly smaller and smaller boxes? Why not make your own homemade Thin Mints instead of offering your first born as pay for one box of delights.
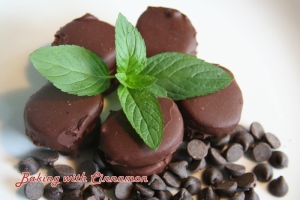
The original recipe can be found at the ever useful Baking Bites, and check out Crepes of Wrath for her (successful!) attempt.
To make your homemade Thin Mints, get together these ingredients:

Thin Mint Batter (for chocolate coating see below):
Wet Team:
- 1 cup white sugar
- 1/2 cup (1 stick) butter, room temperature
- 1/3 cup milk
- 1/2 teaspoon vanilla extract
- 3/4 teaspoon peppermint extract
Dry Team:
- 2 1/4 cups AP flour
- 1/4 cup cornstarch
- 6 tablespoons unsweetened cocoa powder
- 1/2 teaspoon salt
Hardware for project:
- Measuring spoons
- Mixer
- Baking sheets
- Parchment paper
- Double boiler (easy to make from two pots)
- Two forks
- Large spoon for mixing
- Knife
First, cream sugar and butter until fluffy and then add milk and extracts. Don’t be concerned if the batter looks curdled and icky — just keep beating and beating until everything comes together.

Now add in the dry team. If you are using a mechanical mixer, make sure to turn it off before adding the dry team to prevent poofs of flour all over the place. Take time to scrape down the dough off the sides of bowl.
Once the dough forms a ball in the mixer, pull it out. You should have something like this;
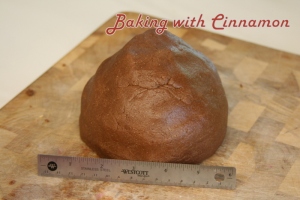
Divide the dough ball into two equal sections (I just eyeballed it). At this point you must make a decision: two logs or four? Both Baking Bites and Crepes of Wrath did two logs, but we decided to make four. Does it make a difference? Yes and no. Yes, because a larger log’s cookie has a better chance of being chewy, while the smaller log’s cookie will likely have a crunch. Following? Yes? Okay.
So you have either two or four dough balls.
The next step is important (!!) so get out a clean ruler (no, I’m not kidding) and move the dough balls to a clean large surface. You want to roll each of the balls into logs; this is done by applying pressure equally along the ball and rolling your hands gently, so that the dough rolls into a log-like thing. Keep doing this! It’ll be awkward, especially if you’ve never rolled dough before.
If you’ve opted for only two logs, aim for 1 1/2 inch diameter, but if you’ve opted for four logs, aim for 1 1/4 inches. My baking partner and I were (ahem) pretty casual about consistency, and in the end we paid for those casualties. 😛
Once you are happy with your logs, wrap them in plastic wrap and freeze for 2+ hours. Don’t skip this step! When working with chocolate batter it is important to cool it off considerably –why?– because the melting point of chocolate is lower than our body temperature and thus the batter will become sticky and too pliable from the warmth of your hands. We want this batter to stay cool enough to maintain a shape and not get all over your hands.

After you’ve patiently waited (and waited and waited), pull out the logs, a favorite knife and your clean ruler. Unwrap logs and slice precisely, aiming for 1/4-1/3 inch thick pieces. Again, we were pretty casual with this and after baking some of the pieces were crispier than others, so if consistency is important to you, use a ruler!
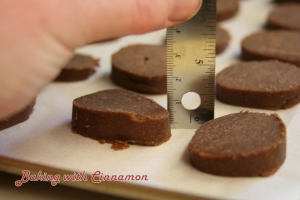
Line two baking sheets with parchment paper and place Thin Mint slices for baking. The cookies do not spread, so feel free to squish ’em in. As you can see below, did just that:

Bake your homemade Thin Mints in a 375` oven for 13-15 minutes, rotating the baking sheets half way through the cooking time. Depending on how thick or thin your cookies are, expect crisp (or nearly crisp) cookies. Look for a slight change in color around the edges at the 13 minute mark, and definitely pull them at 15 minutes, even if the cookies do not look done yet.
While your cookies are cooling (yay!), prepare your double boiler (see above for link and explanation) and chop your chocolate and butter for coating these bad boys.
Chocolate coating ingredients:
- 20 ounces chocolate (We got a combination of milk and dark chocolate, while Crepes of Wrath uses only milk chocolate)
- 1 cup butter, soft
Tempering chocolate hardware:
- Double boiler
- Parchment or wax paper
- Forks
- Large spoon for stirring
- Knife
Note: The original recipe calls for only 10 ounces chocolate and 1/2 cup butter, but at the suggestion of Crepes of Wrath, we doubled our chocolate and butter portions to have plenty and some for left over chocolate-creations (yay, chocolate disks!).

Stir the butter and chocolate mix with a large wooden spoon to prevent it from sticking and burning at the bottom of your pot. As the concoction melts, add more chopped chocolate and butter. Once most of the chocolate and butter is added, it ought to look something like this:

After a bit more stirring, now is the time to dip your cookes in the tempered chocolate! Whee!
As casual as this sounds, it works; I just dropped four cookie rounds into the melted chocolate, flipped ’em with a fork until fully covered with yummy chocolate goodness, and then finagled ’em out of the double boiler onto a waiting parchment paper section. Expect splashes, messiness, and chocolate drips!
As the tempered chocolate level gets low, add more chopped chocolate and butter until done, stirring continuously.

Take lots of pictures while your friend does the work of dipping cookies into tempered chocolate. Attempt to make bad jokes to make him smile while you snap away.

Expect some air bubbles. Unfortunately, I don’t know how to prevent them, but I would imagine that giving ’em a final tap and shake after coating in chocolate, and the bubbles will pop. If someone has a better suggestion, please let me know in the comments. Ours ended up having dimples and were kinda funny (but so so yummy):

And just to show you that not all of them came out so lovely, here were some of my favorite goofy looking ones (and therefore were eaten first). Not only were there air bubbles, but uneven chocolate application, and finger prints (ahem, not my handy work):
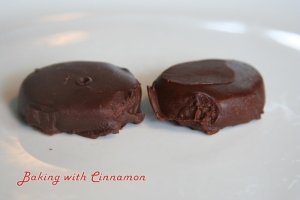
Once the cookies are coated and cooled put the ones you don’t immediately eat into the freezer for 2+ hours to harden the chocolate coating. I used a large square tupperwear and layered the cookies with parchment paper layers.
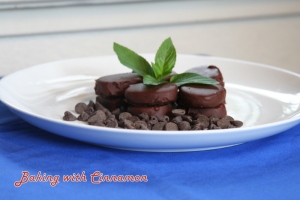
And viola! You have homemade Thin Mints, and you didn’t have to offer your first born as exorbitant payment! Make sure to adorn with a fresh sprig of mint and elaborately sprinkle with chocolate pieces. Take dozens of pictures at a series of angles, and pick your favorite to show off to friends and family. ^_^
This entry was posted on June 12, 2009 at 8:43 pm and is filed under Baking, Cookies. Tagged: Baking, Chocolate, Cookies, Mint. You can follow any responses to this entry through the RSS 2.0 feed. You can leave a response, or trackback from your own site.
Heather said
Yum yum yum! Those look so tasty. 🙂
John S said
Excellent chocolate mint cookies . . . and thank you for the very descriptive content and photos . . . I look forward to more of these from you, and more of your other baking goodies.